Overview of installation an Air Curtain
Overview of installation an Air Curtain
- Choose the right spot: Above the doorway is ideal. Make sure there's enough space and it won't be in the way.
- Get your tools ready: You'll need basic tools like a drill, screwdriver, and measuring tape. Check the manufacturer's instructions for specifics.
- Position the mounting plate: This acts as a base for the air curtain. Use a level to ensure it's straight.
- Secure the plate: Drill holes and use anchors if needed, then attach the plate firmly to the wall or ceiling.
- Attach the air curtain: Carefully connect the air curtain to the mounting plate, making sure it's secure.
- Power it up: Connect the air curtain to the electrical circuit, following safety guidelines and the instructions. If you're unsure about electrical work, get a qualified electrician to help.
- Set up controls: If your air curtain has a remote or other controls, install and connect them as instructed.
- Turn it on: Test the air curtain to make sure the airflow is directed downwards and covers the whole doorway.
- Fine-tune: Adjust the air strength and direction as needed.
- Inspect: Make sure everything is securely in place and all connections are properly made.
- Clean up: Remove any leftover materials or packaging.
- Always follow the manufacturer's instructions: They provide specific guidance for your model.
- Safety first: Turn off the power before doing any electrical work.
- Maintenance is key: Regularly clean filters and components for optimal performance.
Installing an air curtain correctly is key to enjoying its benefits – a more comfortable environment, better hygiene, and energy savings. Here's a simplified overview of the process:
1. Plan:
2. Mount:
3. Connect:
4. Test and Adjust:
5. Final Checks:
Remember:
How to Install an Air Curtain Step-by-Step
How to Install an Air Curtain Step-by-Step
Before you start:
- Safety first: Turn off the power to the electrical circuit where you'll be installing the air curtain.
- Gather your tools: You'll typically need:
- Measuring tape
- Level
- Drill with appropriate drill bits
- Screwdriver
- Appropriate anchors (if needed for your wall type)
- Manufacturer's instructions and any provided mounting hardware
Step 1: Prepare the Air Curtain and Doorway
- Unpack the air curtain: Carefully unpack the air curtain and check for any damage. Ensure all parts and accessories are included.
- Clean the doorway: Clean the area around the doorway to ensure a dust-free installation.
Step 2: Position and Mark Mounting Points
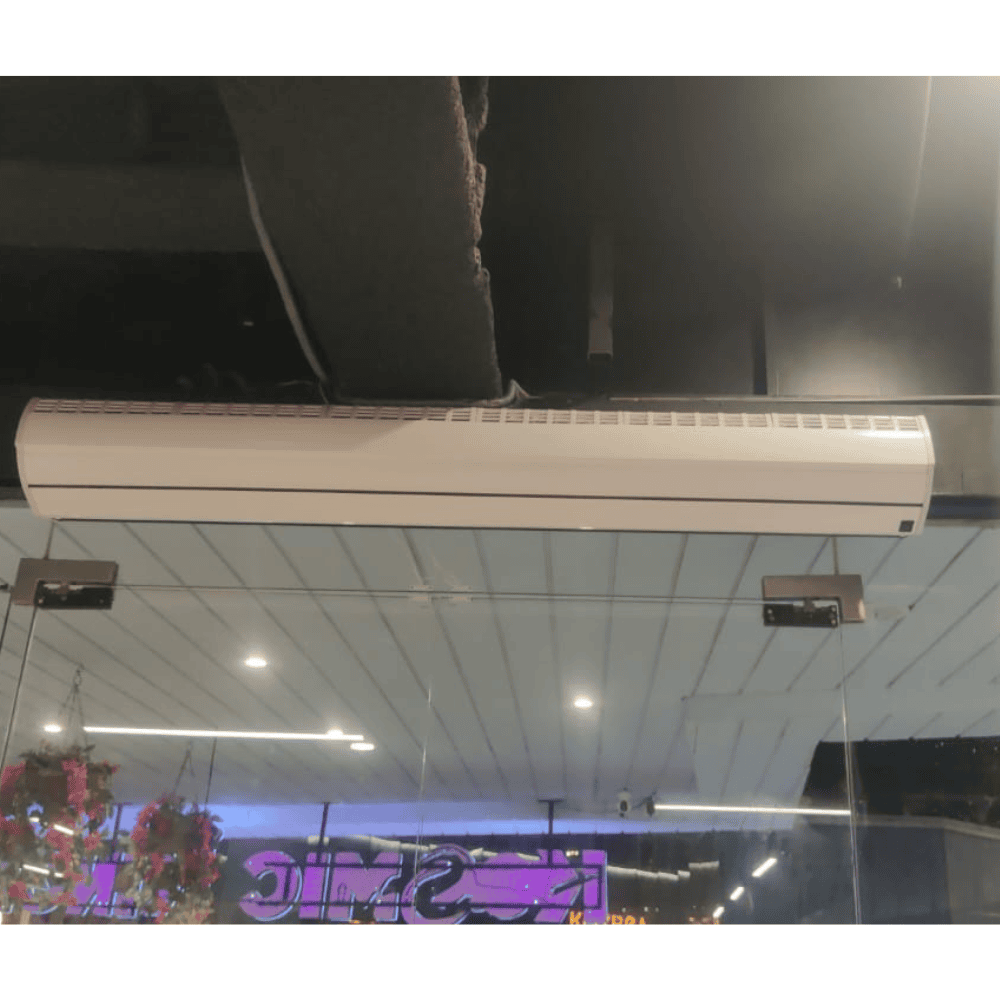
- Determine the mounting height: Refer to the manufacturer's instructions for the recommended mounting height. Generally, it's best to mount the air curtain as close to the top of the doorway as possible for optimal performance.
- Position the mounting plate: Use the provided mounting plate (or the air curtain unit itself as a template) to mark the drilling locations on the wall or ceiling. Ensure the plate is level and positioned correctly to cover the entire width of the doorway.
Step 3: Secure the Mounting Plate
- Drill pilot holes: Drill pilot holes at the marked locations using the appropriate drill bit size.
- Install anchors (if needed): If you're mounting into drywall or another material that requires anchors, insert the appropriate anchors into the pilot holes.
- Attach the mounting plate: Securely attach the mounting plate to the wall or ceiling using the provided screws or fasteners.
Step 4: Attach the Air Curtain to the Mounting Plate
- Carefully lift the air curtain: With assistance if needed, carefully lift the air curtain unit and align it with the mounting plate.
- Secure the air curtain: Attach the air curtain to the mounting plate according to the manufacturer's instructions. Ensure it's securely fastened and doesn't wobble.
Step 5: Make Electrical Connections
- Connect the power supply: Connect the air curtain to the electrical circuit according to local electrical codes and the manufacturer's instructions. Use a qualified electrician if you're unsure about any aspect of the electrical wiring.
- Connect controls (if applicable): If your air curtain has a remote control, thermostat, or other control devices, install and connect them according to the instructions.
Step 6: Test and Adjust
- Turn on the air curtain: Switch on the power and test the air curtain's operation.
- Check airflow direction: Ensure the airflow is directed downwards and covers the entire width of the doorway.
- Adjust settings: Fine-tune the air velocity and direction as needed to create an effective barrier. Consult the user manual for instructions on adjusting settings and features.
Step 7: Final Checks and Cleanup
- Inspect the installation: Double-check that the air curtain is securely mounted, all connections are properly made, and there are no loose parts.
- Clean the area: Remove any debris or packaging materials from the installation area.
Tips for a Successful Air Curtain Installation
Tips for a Successful Air Curtain Installation
1. Measure Twice, Drill Once:
- Accurate measurements are essential: Carefully measure the doorway width and height to select the right size air curtain and ensure proper placement of the mounting plate. Double-check your measurements before drilling any holes. Double-check your measurements before drilling any holes. Double-check your measurements before drilling any holes. Double-check your measurements before drilling any holes. Double-check your measurements before drilling any holes.
- Consider obstructions: Take note of any potential obstructions above the doorway, such as lights, pipes, or sprinkler systems. You may need to adjust the mounting position or use extension brackets to ensure proper clearance.
2. Level is Key:
- Ensure a horizontal mounting plate: Use a level to ensure the mounting plate is perfectly horizontal. This will ensure the air curtain hangs straight and the airflow is directed downwards evenly.
- Check the air curtain unit: After attaching the air curtain to the mounting plate, use a level to confirm that the unit itself is also level.
3. Choose the Right Anchors and Fasteners:
- Consider the mounting surface: Use appropriate anchors and fasteners for the specific wall or ceiling material you're mounting to (e.g., drywall, concrete, steel). This will ensure a secure and stable installation.
- Weight matters: Select anchors and fasteners that can support the weight of the air curtain unit.
4. Don't Overtighten:
- Avoid stripping screws: When securing the mounting plate and air curtain, be careful not to overtighten the screws, as this could damage the unit or the mounting surface.
- Snug is enough: Tighten the screws until they are snug, but avoid excessive force.
5. Electrical Connections:
- Safety first: If you're not comfortable with electrical wiring, hire a qualified electrician to handle the electrical connections.
- Follow the instructions: Carefully follow the manufacturer's instructions and local electrical codes when connecting the air curtain to the power supply.
- Double-check connections: Before turning on the power, double-check all electrical connections to ensure they are secure and properly wired.
6. Test Thoroughly:
- Check airflow direction and coverage: After turning on the air curtain, verify that the airflow is directed downwards and covers the entire width of the doorway.
- Adjust settings: Fine-tune the air velocity and direction as needed to create an effective barrier. Refer to the user manual for instructions on adjusting settings.
7. Mind the Gaps:
- Minimize gaps: Ensure there are no gaps between the air curtain and the doorway or surrounding surfaces. This will prevent air from escaping or entering and maximize the effectiveness of the air curtain.
- Consider door swing: If you're installing the air curtain on a swinging door, make sure the air curtain doesn't interfere with the door's movement.
8. Regular Maintenance:
- Keep it clean: Regularly clean the air curtain's filters and components to ensure optimal performance and longevity.
- Check for wear and tear: Periodically inspect the air curtain for any signs of wear and tear, and address any issues promptly to prevent further damage or malfunction.
By following these tips and paying attention to detail, you can ensure a successful air curtain installation and enjoy its benefits for years to come.
Importance of regular maintenance of Air Curtain
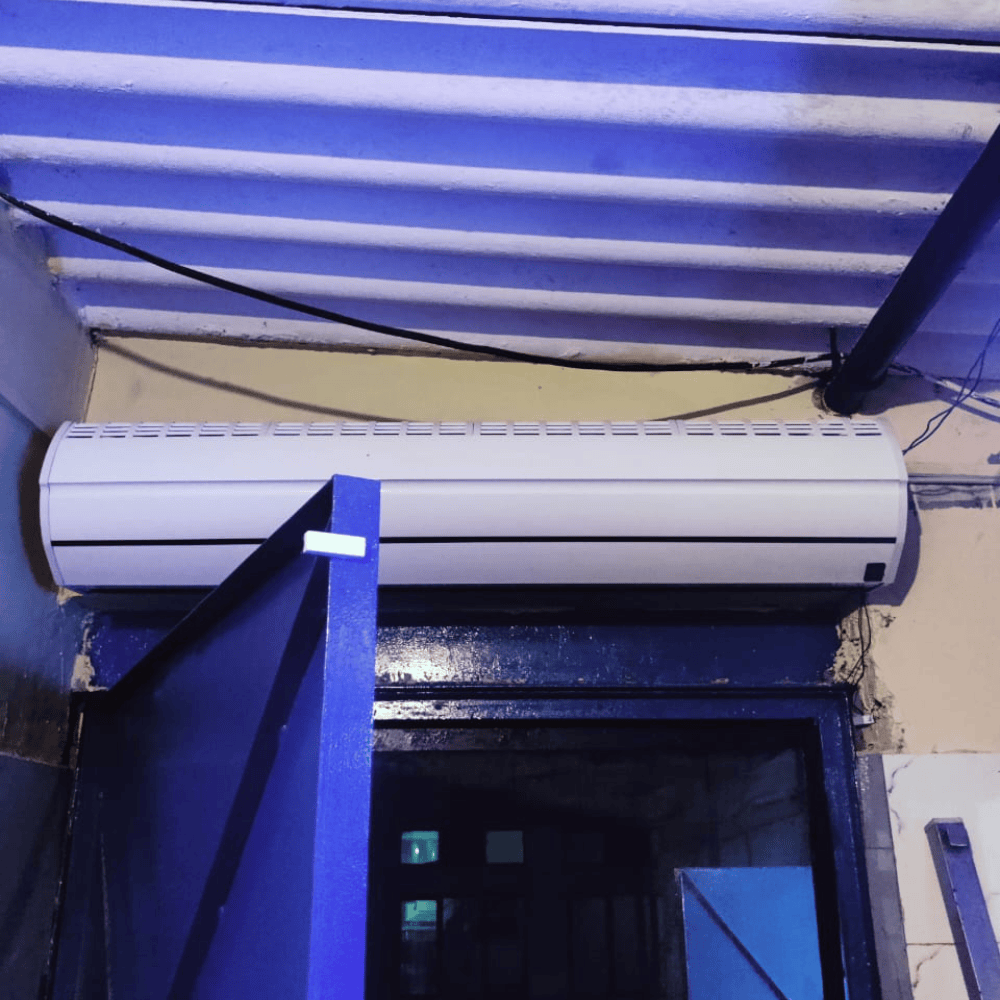
Regular maintenance is crucial for keeping your air curtain running smoothly and efficiently. Neglecting maintenance can lead to decreased performance, increased energy consumption, and even premature failure of the unit. Here's why it's so important:
1. Optimized Performance:
- Consistent airflow: Regular cleaning prevents dust and debris from clogging filters and obstructing airflow, ensuring the air curtain maintains a strong and effective barrier.
- Reduced noise: A clean air curtain operates more quietly, creating a more pleasant environment.
- Proper heating (if applicable): For heated air curtains, cleaning ensures efficient heat transfer and prevents overheating.
2. Energy Savings:
- Lower energy consumption: A well-maintained air curtain operates more efficiently, minimizing energy waste and reducing electricity bills.
- Prolonged lifespan: Regular maintenance can extend the lifespan of the motor and other components, reducing the need for costly replacements.
3. Improved Hygiene:
- Cleaner air: Clean filters effectively trap dust, pollen, and other airborne contaminants, contributing to better air quality.
- Pest prevention: Regular cleaning helps prevent the buildup of debris that can attract pests, maintaining a more hygienic environment.
4. Reduced Repair Costs:
- Preventative maintenance: Regular inspections can identify potential issues early on, allowing for minor repairs before they become major problems requiring expensive repairs or replacements.
- Warranty compliance: Many manufacturers require regular maintenance to maintain warranty validity.
5. Enhanced Safety:
- Reduced fire hazard: Dust buildup can be a fire hazard, especially in heated air curtains. Regular cleaning minimizes this risk.
- Prevent electrical issues: Inspecting and cleaning electrical components can help prevent malfunctions and potential electrical hazards.
Key Maintenance Tasks:
- Cleaning filters: Regularly clean or replace filters according to the manufacturer's recommendations.
- Cleaning exterior surfaces: Wipe down the exterior surfaces of the air curtain to remove dust and grime.
- Inspecting components: Periodically inspect the motor, fan, and other components for any signs of wear and tear.
- Checking electrical connections: Ensure all electrical connections are secure and free from corrosion.
Choosing the best installation Engineers for Air Curtain Installing
Choosing the right engineers to install your air curtain is crucial for ensuring proper installation, optimal performance, and long-term satisfaction. Here are some key factors to consider when selecting installation engineers:
1. Experience and Expertise:
- Air curtain specialization: Look for engineers or contractors with specific experience in installing air curtains. They'll have the knowledge and skills to handle the unique requirements of these systems.
- Relevant certifications and licenses: Check for certifications or licenses related to HVAC installation, electrical work, or general contracting, depending on the complexity of the installation.
- References and portfolio: Ask for references from previous clients or view their portfolio of past air curtain installations to assess their experience and quality of work.
2. Comprehensive Service:
- Site assessment: Choose engineers who offer a thorough site assessment to evaluate your specific needs and recommend the most suitable air curtain and installation approach.
- Complete installation service: Opt for engineers who handle the entire installation process, from mounting the unit to making electrical connections and testing the system.
- Post-installation support: Inquire about post-installation support, including troubleshooting, maintenance, and warranty service.
3. Professionalism and Reliability:
- Clear communication: Choose engineers who communicate clearly, providing detailed explanations and answering your questions throughout the process.
- Punctuality and efficiency: Select engineers who are punctual, efficient, and respectful of your time and property.
- Insurance and warranties: Ensure the engineers have adequate insurance coverage and offer warranties on their workmanship.
4. Cost and Value:
- Competitive quotes: Obtain quotes from multiple engineers to compare prices and services.
- Value over price: While cost is a factor, prioritize value and quality over the lowest price. Consider the engineer's experience, expertise, and reputation.
- Transparent pricing: Choose engineers who provide transparent pricing with no hidden fees or surprises.
5. Other Considerations:
- Local expertise: Consider hiring local engineers who are familiar with local building codes and regulations.
- Reviews and recommendations: Check online reviews and seek recommendations from other businesses or contractors who have had air curtains installed.
- Environmental considerations: If sustainability is a priority, inquire about the engineer's experience with energy-efficient air curtain installations and eco-friendly practices.

